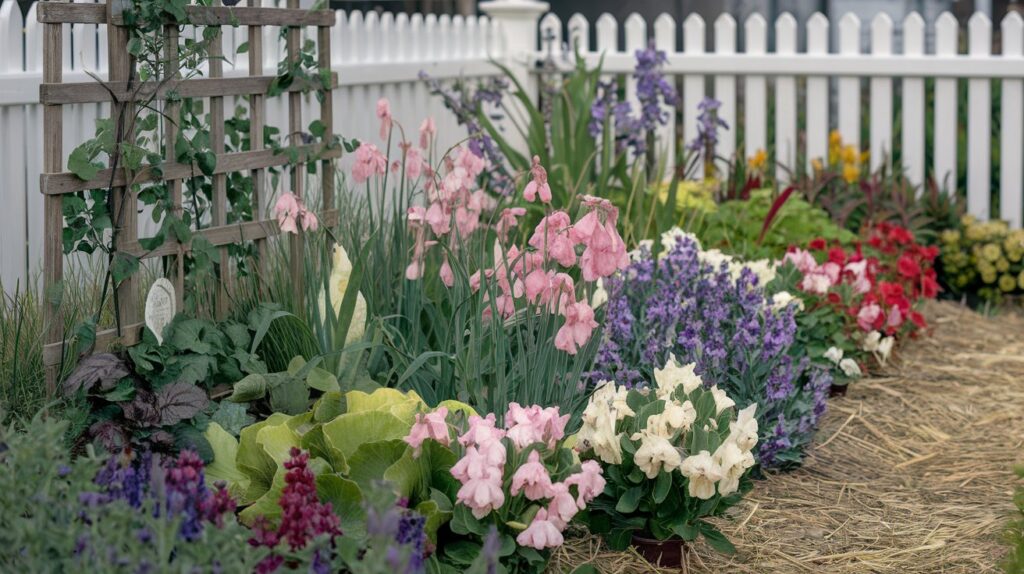
Gardening can be a rewarding yet costly hobby, particularly when it involves starting plants from seeds. Many gardeners turn to indoor setups that require grow lights, heat mats, and other equipment that can quickly escalate costs. However, there is an alternative method that is not only budget-friendly but also leverages the dormant winter months to get a head start on spring planting: winter sowing.
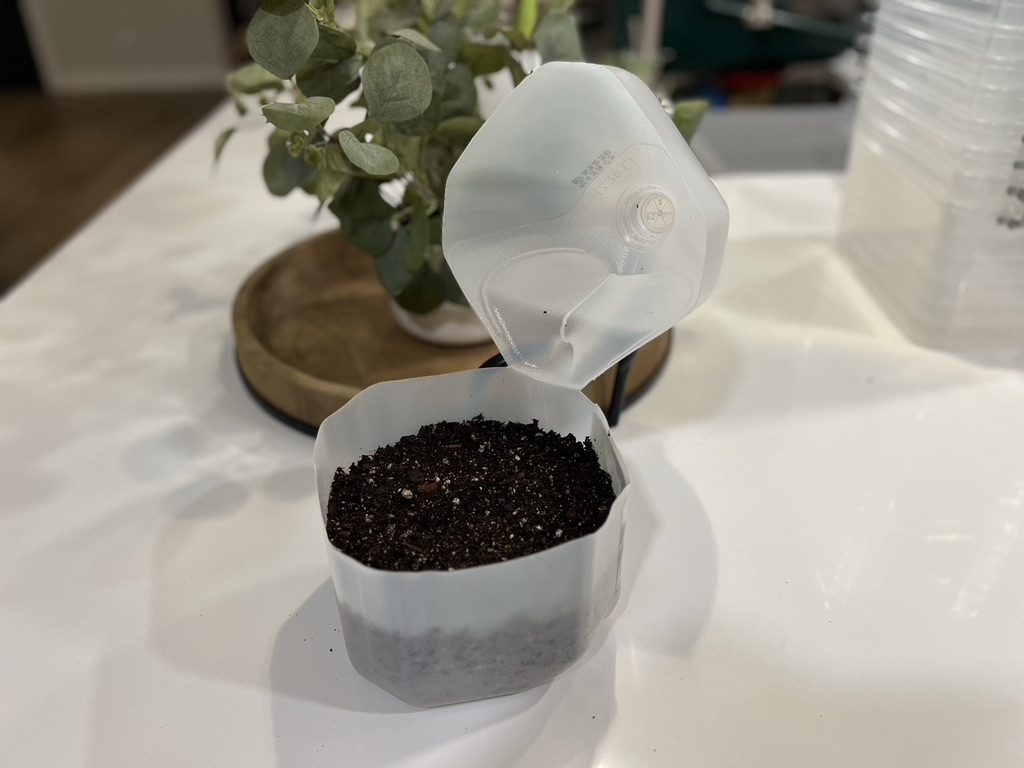
Winter sowing is a simple, resourceful gardening technique using recycled containers to create mini greenhouses for seeds. This method allows seeds to be sown outdoors during the winter, using the natural climate to stratify and germinate the seeds as the weather warms. It’s a process that doesn’t require expensive equipment or much space. All you need are clear or translucent containers, soil, and seeds—most of which you might already have at home.
The advantages of starting seeds in winter using this method are numerous. It eliminates the need for costly indoor space and energy-consuming equipment. By sowing seeds in secured containers outdoors, they naturally experience the seasonal cycle required to break dormancy and sprout at the optimal time. This reduces effort and expense and results in hardier, more resilient plants that are well-adjusted to the local climate from the moment they begin growing.
Winter sowing is an excellent option for gardeners who want to extend their growing season without extending their budget. It’s an eco-friendly approach that maximizes efficiency and effectiveness, allowing nature to do much of the work. By the time spring arrives, you’ll be rewarded with robust seedlings ready to thrive in your garden.
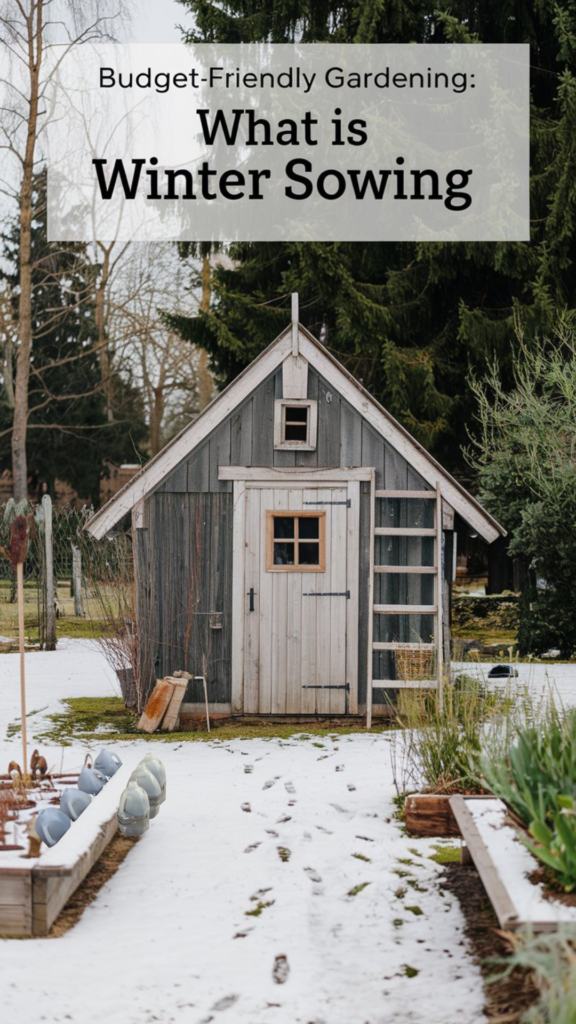
What is Winter Sowing?
Winter sowing is a gardening technique that harnesses the natural elements of winter to germinate seeds. By planting seeds in miniature greenhouses made from recycled containers, gardeners can start their seedlings outdoors, even in the cold. These containers protect the seeds from the extremes of winter weather while exposing them to the natural cycles of freezing and thawing, which are crucial for breaking seed dormancy.
This method utilizes the principle of stratification, which is a natural process that many seeds undergo in their native environments. Stratification requires cold temperatures to help soften seed coats and trigger germination as the conditions improve with the onset of spring. By mimicking these natural processes, winter sowing effectively prepares seeds for a robust start without any manual intervention.
The environmental conditions that enable winter sowing include the presence of cold winter weather with its natural freeze-thaw cycles. This method is particularly effective in regions with distinct seasons, where temperatures drop enough to meet the stratification needs of the seeds but not so extreme as to freeze the soil completely solid for prolonged periods. The protective containers ensure that the seeds stay moist and insulated against harsh conditions like wind, heavy snow, and wild animals. As the season transitions from winter to spring, the gradually warming temperatures and increasing daylight cue the seeds to sprout, perfectly timed to thrive in the upcoming growing season.
Winter sowing is possible thanks to these seasonal changes and environmental conditions, making it a unique, low-cost, and low-maintenance method for gardeners across various climates to start their gardens early.
Benefits of Winter Sowing
Winter sowing offers several significant advantages that can appeal to both novice and experienced gardeners alike. Here’s why this method is gaining popularity:
Cost Savings
One of the most compelling benefits of winter sowing is the cost efficiency it brings to gardeners. Traditional indoor seed starting often requires an initial investment in equipment such as grow lights, heating mats, and specialized trays. These setups not only cost money to purchase but also to operate, as they consume electricity throughout the growing season. Winter sowing eliminates these costs by using the winter sun and natural outdoor temperatures to achieve the same results. The minimal setup involves only recycled containers and some potting soil, significantly reducing the financial barrier to starting seeds.
Space Efficiency
Indoor seed starting can take up a lot of room. Shelves lined with trays and equipment can quickly overwhelm a living space or clutter a garage. Winter sowing, on the other hand, is done entirely outdoors, freeing up interior spaces. Containers can be neatly arranged outside, where they utilize natural environmental conditions without encroaching on your living area. This makes winter sowing especially attractive for those with limited indoor space or who prefer to keep their homes uncluttered.
Recycling
Winter sowing is not just budget-friendly; it’s also eco-friendly. This method promotes the use of recycled materials, turning waste into valuable gardening tools. Common household items like milk jugs, water bottles, and salad containers can be transformed into effective mini greenhouses. This approach encourages gardeners to reduce waste and repurpose items that would otherwise end up in landfills, aligning gardening practices with sustainability goals.
Healthy Seedlings
Plants started with the winter sowing method are often healthier and more resilient than those started indoors. This is due to their gradual exposure to the elements, which encourages a natural adaptation process. These seedlings undergo a gentle hardening off period, as they are already growing in the conditions they will face in the garden. As a result, they are typically stronger and better equipped to handle the transition to outdoor life without the shock that indoor-started plants might experience. Moreover, the natural light and air circulation they get from being outdoors contribute to their robust growth, making them less susceptible to diseases common in the more controlled, but often less ideal, indoor environments.
In summary, winter sowing offers an array of benefits that make it an attractive option for gardeners. From saving money and space to promoting recycling and producing vigorous, garden-ready plants, this method leverages the simplicity and effectiveness of nature’s own processes to enhance gardening success.
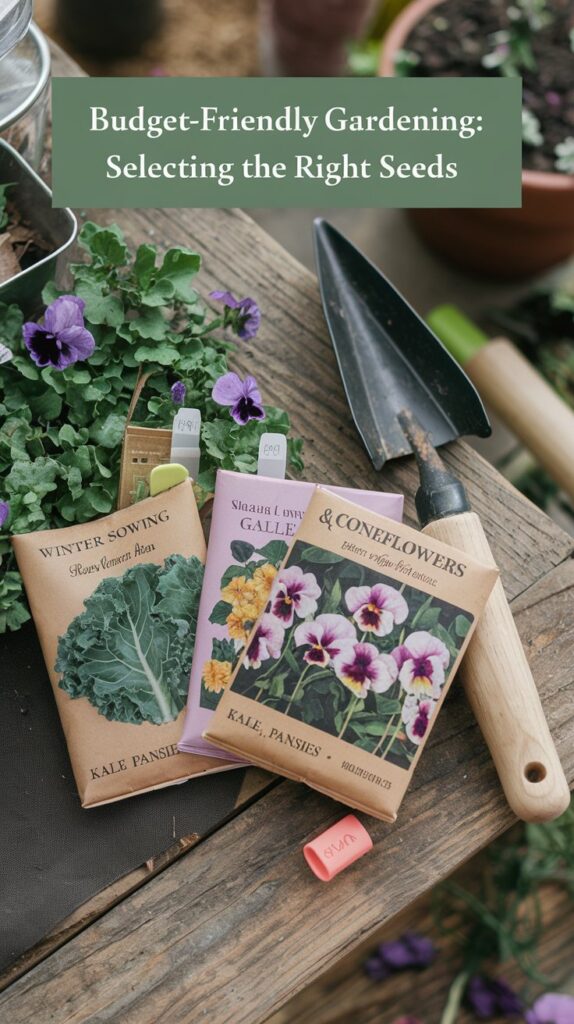
Selecting the Right Seeds
Choosing the correct seeds for winter sowing is crucial for success. While not every plant variety is suited for this method, many hardy annuals, perennials, and vegetables thrive under these conditions. Here’s a guide to help you select the best seeds for winter sowing:
Hardy Annuals
Hardy annuals are perhaps the most straightforward and rewarding for winter sowing. They can endure cold temperatures and still germinate vigorously when the conditions are right. Examples include:
- Sweet Alyssum: Known for its resilience and early blooms, perfect for early spring color.
- Calendula: Often sown in winter for its ability to sprout as soon as the soil can be worked in spring.
- Pansies: These cold-hardy flowers can survive freezing temperatures and bloom beautifully in early spring.
Perennials
Perennials that require stratification (a cold period) to germinate are excellent candidates for winter sowing. This method naturally provides the cold exposure these seeds need:
- Coneflowers (Echinacea): Known for their drought tolerance and long-lasting blooms, they are ideal for winter sowing.
- Black-eyed Susans (Rudbeckia): These robust flowers adapt well to a variety of conditions and benefit from the stratification winter sowing provides.
- Lupines: With their need for cold to break seed dormancy, winter sowing is perfect to start these striking flowers.
Vegetables
Many vegetables can also be started using winter sowing, particularly those that tolerate or even require a bit of cold:
- Kale: This hardy green can sprout in cool temperatures, making it ideal for early planting through winter sowing.
- Broccoli: Known for its preference for cool weather, starting broccoli seeds in winter helps get a head start on spring planting.
- Lettuce: Another cool-weather crop that responds well to the gradual warming of spring, perfect for winter sowing.
Other Considerations
When selecting seeds, consider your local climate and the specific needs of the plants. Some seeds may perform better with winter sowing in colder regions, while others might be suited to slightly warmer or transitional zones. Always check the seed packet for any specific germination requirements, such as additional pre-treatment, to ensure the best results.
By choosing the right seeds for winter sowing, you can maximize your garden’s potential with minimal input, letting nature do much of the work for you. This method not only simplifies the gardening process but also enhances the diversity and beauty of your garden with plants that are well-adapted to your local environment from the start.
Gathering Materials
Before you begin winter sowing, gathering the right materials is essential. This section will guide you on choosing the best containers, soil mixes, and tools to ensure your winter sowing efforts are successful and efficient.
Containers
The first step in winter sowing is to select suitable containers that can be converted into mini greenhouses. The best containers are those that are clear or translucent, to allow sunlight in, and are deep enough to accommodate growth without crowding the seedlings. Here are some common household items that can be repurposed for winter sowing:
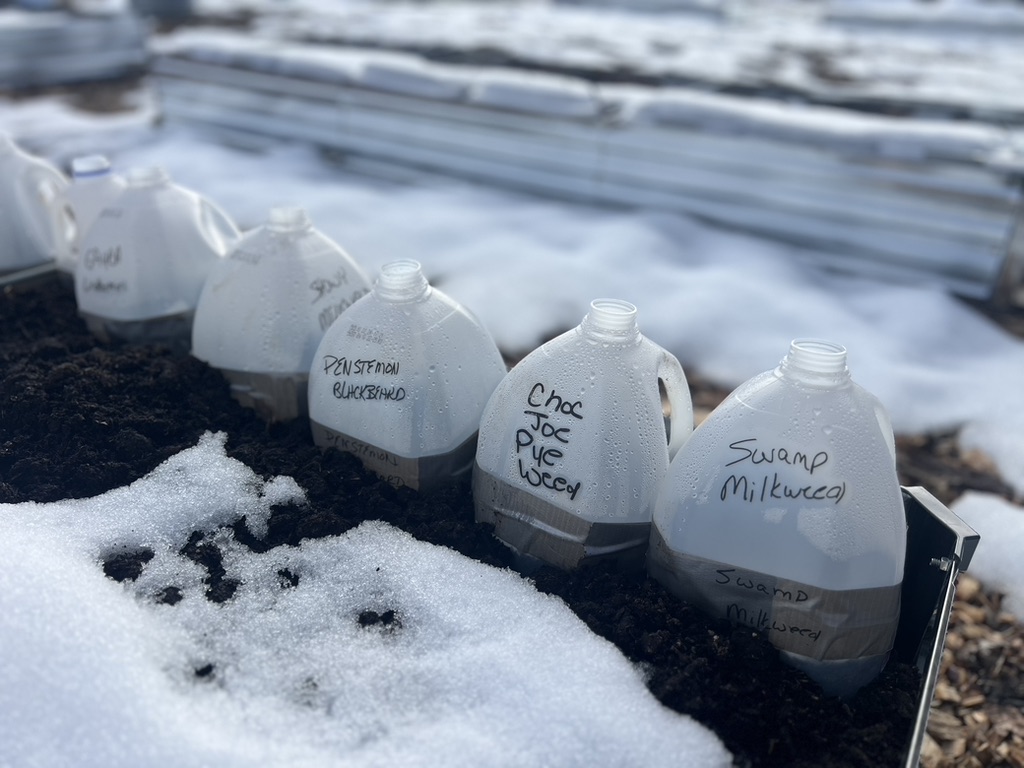
- Milk Jugs: These are ideal because they’re large enough to hold a good amount of soil and seedlings, and their opaque sides diffuse sunlight perfectly.
- 2-Liter Soda Bottles: Like milk jugs, they are clear and can be easily cut to create a greenhouse effect.
- Clear Salad Containers: These often come with lids that are perfect for creating a sealed environment while still allowing for some air circulation.
- Takeout Containers: Particularly those made from clear plastic can be reused as effective sowing containers.
When preparing these containers, make sure to clean them thoroughly and make holes in the bottom for drainage and a few near the top for ventilation.
Soil and Amendments
Choosing the right soil mix is critical for the success of your seedlings. A good starting mix should be lightweight, well-draining, and fertile:
- Potting Soil: Opt for a high-quality potting soil that is specifically designed for seed starting. These mixes are usually finer and less dense than regular garden soil, which helps with root development and moisture retention.
- Amendments: Depending on the nutrient content of your potting soil, you might want to add amendments. Perlite or vermiculite can improve drainage and aeration, while compost or worm castings can enrich the soil with nutrients.
Pre-moisten your soil mix before adding it to the containers to ensure it’s uniformly damp and ready to support seed germination.
Tools
A few basic tools will make the process of preparing and maintaining your winter sowing containers easier:
- Utility Knife or Scissors: Needed for cutting open containers.
- Drill or Nail: Useful for making drainage holes in the bottom of your containers.
- Permanent Marker: Essential for labeling your containers. Write the name of the plant and the sowing date both on the container itself and on any plant tags or labels you might use inside.
- Duct Tape: After sowing the seeds and sealing the soil with the container’s cut-off top, use duct tape to secure the edges and create a hinged lid. This setup allows for easy access for watering and eventual acclimatization of the seedlings to outside conditions.
With these materials at hand, you’re ready to start winter sowing. Gathering everything before beginning your project ensures a smooth and enjoyable seeding process. This approach not only saves money but also recycles materials, reducing waste and benefiting the environment.
Step-by-Step Winter Sowing Guide
Winter sowing can be a fun and simple way to start your garden. Follow these detailed steps to ensure your seeds have the best chance of thriving:
Preparation
- Clean Your Containers: Start by thoroughly washing your selected containers with soapy water to remove any residues or contaminants. Rinse them well to ensure they are clean.
- Make Drainage and Ventilation Holes: Use a drill, nail, or large needle to create several small drainage holes at the bottom of each container. This will allow excess water to escape and prevent your seeds from waterlogging. Additionally, make a few small holes near the top or on the sides for ventilation to manage humidity and air flow.
Sowing Seeds
- Fill Containers with Soil: Add pre-moistened potting soil or your prepared soil mix to the containers, leaving about an inch of space from the top. This space is necessary to allow room for seedling growth.
- Plant the Seeds: Sow the seeds at the depth recommended on the seed packet. A general rule of thumb is to plant seeds at a depth approximately three times their diameter. If seeds are very small, simply press them lightly into the surface of the soil instead of burying them.
- Space the Seeds Appropriately: Provide adequate space between seeds according to the recommendations for each plant type. This prevents overcrowding and promotes healthier growth. For smaller seeds, a light scattering is sufficient, while larger seeds should be spaced individually.
Sealing and Labeling
- Seal the Containers: After sowing the seeds, replace the top part of the container if you’ve cut it to create a hinge, or secure the lid on top. Use duct tape to hold everything together securely, ensuring that the container remains closed but can be opened later for watering or checking on the seed progress.
- Label Your Containers: Use a permanent marker to write the name of the plant and the sowing date on the outside of the container. You may also want to place a label inside the container as a backup in case the exterior markings fade or get washed off.
Placement
- Choose the Right Location: Place your winter sowing containers in a location where they will be exposed to sunlight but protected from harsh winds. A south-facing side of a building or under a deck are ideal places. Make sure the area receives enough sunlight throughout the day to promote growth once germination begins.
- Monitor and Adjust: Throughout the winter, check on your containers occasionally to ensure they haven’t been disturbed by animals or strong winds. After seeds begin to germinate in early spring, start to open the containers on warm days to acclimate the seedlings to outside conditions, gradually increasing their exposure.
By following these steps, your winter sowing setup will maximize seed germination and provide young plants with a strong start in life. This method not only simplifies the gardening process but also creates an optimal environment for developing resilient and robust plants ready to be transplanted into your garden come spring.
Managing Your Mini Greenhouses
Once your seeds are sown and your mini greenhouses are in place, the bulk of the work is done. However, managing these containers through the winter months is crucial to ensure the success of your winter sowing. Here’s how to monitor and care for your mini greenhouses throughout the season:
Monitoring Moisture Levels
- Check for Adequate Moisture: One of the key aspects of managing your mini greenhouses is ensuring that the soil remains moist but not waterlogged. During much of the winter, the sealed containers will retain moisture adequately without additional watering. However, it’s important to periodically check the moisture levels, especially during unusually warm or sunny days which may cause the soil to dry out more quickly.
- Adding Water: If the soil appears dry, add water sparingly. The goal is to keep the soil moist but not soaking, as excessive water can lead to mold growth and might freeze and damage the seeds. Water during the middle of the day so any excess moisture has a chance to absorb before temperatures drop at night.
Adjusting Exposure
- Protect from Extreme Elements: While the containers are designed to withstand winter conditions, extremely harsh weather may require some temporary adjustments. During particularly severe weather—such as heavy snowfall or ice storms—consider moving the containers to a more sheltered location, such as against the house or under a deck, to protect them from being crushed or overly exposed.
- Ventilation Adjustments: On warmer days, it’s beneficial to open the containers to allow for air exchange and to prevent overheating. Ventilating the containers helps to moderate temperature fluctuations and humidity levels, which are crucial for preventing fungal diseases and promoting healthy seedling development.
Regular Checks
- Weekly Inspections: Make it a habit to inspect your containers at least once a week. Look for signs of germination, check the structural integrity of the containers, and ensure that no animals have tampered with them. This regular check-up helps you catch any issues early and react accordingly.
- Respond to Weather Changes: Be adaptable and ready to respond to changes in the weather. If a sudden warm spell occurs, you may need to increase ventilation to the containers or even start the hardening off process earlier than planned.
By effectively managing your mini greenhouses, you can largely set and forget your winter sowing containers, but these periodic checks and adjustments are essential. This hands-off but attentive approach allows nature to do most of the work, while you ensure that the environment remains conducive to seed germination and growth. With the right care, you’ll be rewarded with a bounty of healthy seedlings ready for transplanting as spring arrives.
Transitioning to the Garden
As winter turns to spring and your seedlings start to sprout and grow within their mini greenhouses, the next crucial step is transitioning them to their permanent spots in your garden. This stage is vital for ensuring your young plants adapt well to their new environment without experiencing transplant shock. Here’s how to determine when your seedlings are ready and tips for a successful transplant.
Recognizing Ready Seedlings
- Size and Strength: Generally, seedlings are ready to be transplanted once they have developed their second set of true leaves. These are the leaves that appear after the initial, simpler seed leaves. At this stage, seedlings are typically robust enough to handle being moved.
- Root Development: Another indicator is the development of a healthy root system. If you gently lift a seedling or peek through a transparent container, you should see a network of white roots filling out the space without excessively circling or tangling.
Tips for Successful Transplanting
- Hardening Off: Before transplanting, seedlings need to be acclimatized to the outside conditions, a process known as hardening off. Begin by exposing the seedlings to the outdoor environment for a few hours each day, gradually increasing their time outside over a week. This helps them adjust to the sunlight, temperature fluctuations, and wind without stress.
- Timing: Choose a cloudy day or late afternoon for transplanting to minimize stress from heat and sun exposure. This gives the plants a better chance to settle in without the immediate stress of midday sun.
- Watering Before Transplanting: Water your seedlings well before moving them from their containers to the garden. Moist soil will cling to the roots, protecting them during the transition and making it easier to manage the seedlings.
- Gentle Handling: When removing seedlings from their containers, handle them gently to avoid damaging the tender stems and roots. If roots are densely packed or circling, lightly tease them apart to encourage outward growth.
- Planting: Dig a hole in your garden bed that is just big enough to accommodate the seedling’s root ball. Place the seedling in the hole at the same depth it was growing in the container, or slightly deeper for leggy plants. Backfill with soil, gently pressing around the roots to eliminate air pockets.
- Watering After Transplanting: Immediately water the new transplants to help settle the soil around the roots and provide necessary hydration. Keep the soil consistently moist for the first few weeks as the seedlings establish themselves in their new location.
- Protection: If late frosts are a concern, be prepared to cover the newly transplanted seedlings with a frost cloth or a similar protective material.
By carefully managing the transition from container to garden, you ensure that your winter-sown seedlings thrive in their new environment. This careful introduction to the garden not only boosts the survival rate but also promotes vigorous growth throughout the growing season, leading to a lush, productive garden.
Winter sowing is a transformative method for gardeners looking to start their seeds efficiently, cost-effectively, and with minimal fuss. This technique capitalizes on the natural winter conditions to manage the germination process, significantly reducing the need for expensive indoor setups and complex equipment. By using simple recycled containers and experiencing the wonder of seeds turning into sprouts under the snow, gardeners can enjoy the magic of nature doing most of the hard work.
The benefits of winter sowing are manifold:
- Cost-Effectiveness: It eliminates the need for costly grow lights, heating mats, and other specialized seed-starting gear. With just a few recycled containers and some basic gardening supplies, you can have a flourishing garden ready by spring.
- Simplicity: This method does not require daily maintenance or constant monitoring, making it ideal for those with busy lifestyles or anyone new to gardening.
- Eco-Friendly Approach: Using recycled materials not only saves money but also helps reduce waste, contributing to a more sustainable gardening practice.
- Stronger Seedlings: The seedlings grown through winter sowing are naturally hardier, better adapted to the outdoor environment, and more resistant to transplant shock compared to those started indoors.
Winter sowing is an excellent way to expand your garden without stretching your budget. It allows you to start a wide variety of plants, from vegetables to perennials, under conditions that encourage strong, healthy growth. Whether you’re a seasoned gardener or just starting out, winter sowing offers a rewarding, low-stress way to kickstart your garden as soon as the ground thaws.
I encourage all garden enthusiasts to try winter sowing. It’s a method that promises less work, less expense, and abundant rewards. Get your seeds, find some containers, and see for yourself how effective and enjoyable winter sowing can be. Embrace this method and watch your garden come to life with minimal investment and maximum satisfaction. Happy gardening!
Now that you’ve learned about the wonderful benefits and simple steps of winter sowing, we’d love to hear from you! Whether you’re a first-timer or a seasoned gardener who’s tried this method, share your experiences in the comments below. What successes have you celebrated? What challenges did you face? Your stories not only inspire but also help build a community of learning and sharing.
If you found this guide helpful, please share it with your fellow garden enthusiasts. Friends, family, and community members who enjoy gardening may also appreciate these budget-friendly tips to enhance their own green spaces. Spread the word and help others discover the joy and simplicity of winter sowing.
Let’s grow together! Share this post and let’s cultivate a community where gardeners can thrive by sharing insights, tips, and success stories about winter sowing. Happy gardening!