Exploring latte art turns a simple coffee into a feast for the eyes and taste buds. Baristas know it’s more than just making espresso. It’s about mastering latte layering, which needs precision, creativity, and skill.
Milk foam is the artist’s tool, letting coffee lovers paint with it. They can make everything from simple hearts to complex rosetta designs. Latte art is a mix of skill and creativity, making coffee a special treat for the senses.
Key Takeaways
- Latte art requires specialized techniques and practice
- Milk texturing is crucial for successful coffee designs
- Espresso quality directly impacts final latte artwork
- Pouring technique determines pattern complexity
- Professional baristas view each drink as an artistic opportunity
Understanding the Basics of Latte Art
Making the perfect latte is an art that needs skill, good tools, and coffee knowledge. Whether you’re making drinks at home or want to be a pro, you must learn about special tools and methods.
Essential Equipment for Latte Art
To create beautiful latte designs, you need the right tools. Here are the main ones:
- High-quality espresso machine with consistent pressure
- Stainless steel milk pitcher with a precise spout
- Calibrated steam wand for perfect milk texturing
- Thermometer for precise temperature control
The Science Behind Milk Texturing
Getting silky microfoam is key for great latte art. The steam wand changes milk proteins, making a smooth, shiny texture. This texture is perfect for detailed designs.
It’s all about adding the right amount of air. This creates velvety microfoam that’s tight and even.
“Great latte art is 50% coffee quality, 50% milk technique” – Professional Barista Wisdom
Coffee Bean Selection and Extraction
The base of a great latte is the espresso. Choose high-quality beans that can make a rich crema. Beans that are medium to dark roast usually make the best espresso shots.
Getting the extraction right is important. Aim for a 25-30 second pull to get a balanced, caramel-colored crema. This crema layer not only adds flavor but also makes a great base for your milk design.
Perfect Milk Steaming Techniques
Mastering milk frothing is an art that turns a simple coffee into a special treat. The secret to amazing latte art is in the milk steaming technique. It’s all about getting the right microfoam texture.
Getting the steam wand right is key. It helps create a smooth flow that breaks down milk proteins. This makes silky microfoam. Here’s how to do it:
- Start with cold, fresh milk in a clean pitcher
- Position the steam wand at a 45-degree angle
- Create a powerful whirlpool motion to incorporate air
- Listen for a subtle chirping sound during texturing
“The perfect microfoam should look like wet paint – smooth and glossy, without large bubbles.”
Temperature control is crucial when steaming milk. Aim for 140-155°F (60-68°C). This temperature makes the milk creamy without burning it. The vortex technique spreads heat evenly, breaking down milk molecules for a smooth texture.
Practice is key to getting better at frothing milk. Focus on:
- Wand depth – just below the milk’s surface
- Consistent circular motion
- Stopping at the right temperature
Pro tip: Always clean your steam wand immediately after use to prevent milk residue buildup and maintain equipment performance.
How to Master the Art of Latte Layering
Making the perfect latte is a mix of skill and precision. Baristas know that how you pour is key. It’s all about finding the right balance between espresso and milk.
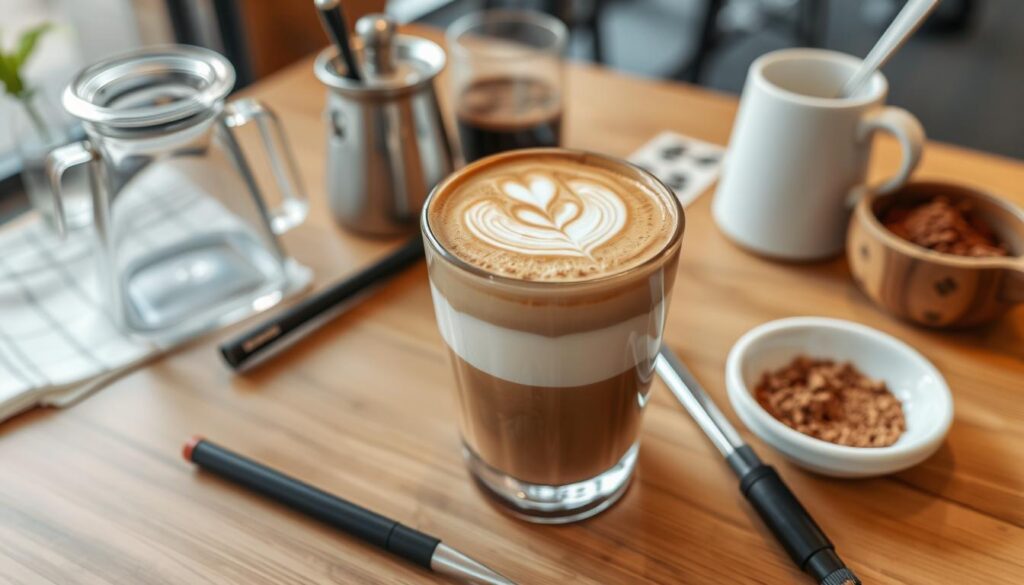
To master latte layering, focus on a few important things. These elements turn a simple coffee into a work of art.
Finding the Right Pouring Height
The height at which you pour is crucial for latte art. Aim for 1-2 inches between your pitcher and the espresso. This distance helps:
- Control the milk-to-espresso ratio
- Keep the espresso’s crema intact
- Create smooth, even layers
Controlling Pour Speed and Flow
Keeping your pour speed steady is vital for clean designs. Baristas suggest a smooth, consistent flow. Move your hand smoothly and keep the pitcher close to the cup.
“Latte art is 70% milk technique, 30% confidence” – Professional Barista Wisdom
Understanding Surface Tension
Surface tension affects how milk and espresso mix. Good milk texture with micro-foam is essential for designs. Proper steaming makes the milk just right for smooth pouring.
Practice and patience are key to mastering these techniques. With each try, you get closer to creating beautiful latte art that pleases the eye and taste buds.
Common Mistakes to Avoid in Latte Layering
Making a perfect latte needs skill and precision. Baristas and coffee lovers often face problems that can mess up their latte art. Knowing these common mistakes can help you improve and make amazing designs.
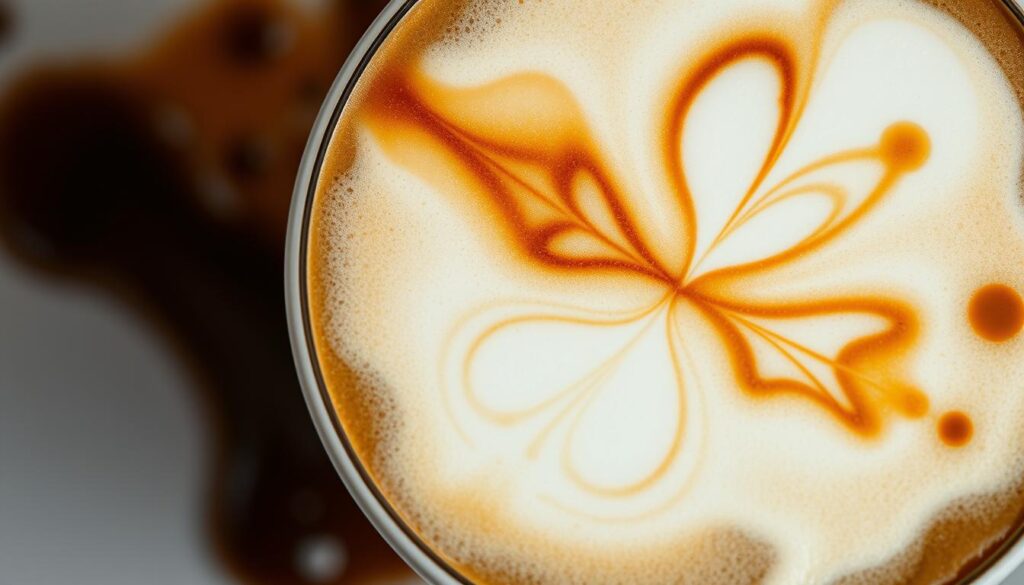
Steaming milk too much is a big mistake. It makes the milk too hot and bubbly, ruining your design. You want to make a smooth, silky milk with small bubbles.
- Avoid overfilling the milk pitcher
- Keep steam wand angle consistent
- Listen for a subtle chirping sound during steaming
Pouring milk unevenly can mess up your design. You need a steady hand and controlled pouring. Start with a low pour and slowly increase it as you get better.
| Mistake | Impact | Solution |
|---|---|---|
| Oversteamed Milk | Rough texture, broken patterns | Gentle steaming, watch for microfoam |
| Inconsistent Pour | Broken design | Practice steady hand movement |
| Temperature Issues | Rapid milk separation | Maintain optimal milk temperature |
Temperature problems can ruin your latte. Ideal milk temperature ranges between 140-160°F. If the milk is too hot or cold, it will separate and mess up your design.
“Perfection in latte art is about control – of milk, pour, and temperature.” – Professional Barista
Practice and patience are key to overcoming these challenges. Every mistake is a chance to get better and improve your latte art skills.
Creating Basic Latte Art Patterns
Mastering latte art takes patience, practice, and knowing free-pour techniques. Baristas and coffee lovers can turn a simple coffee into art. This is done by pouring milk carefully and focusing on symmetry.

Learning basic latte art patterns is key to more complex designs. It’s all about getting milk texture right and pouring with precision.
Heart Pattern Technique
The heart pattern is a great starting point for latte art. Here’s how to make it:
- Start with perfectly steamed milk
- Pour from a moderate height into the center of the espresso
- Gently wiggle the pitcher to form the heart’s base
- Finish with a quick pull-through motion
Rosetta Design Steps
Rosetta patterns need more skill. This leaf-like design requires smooth wrist movements and controlled milk flow.
- Begin by creating a white base in the espresso
- Shake the pitcher side-to-side while moving backward
- Complete with a clean stroke through the pattern
Simple Tulip Creation
The tulip design is a step up from the heart and rosetta patterns. It needs perfect symmetry, achieved by layering milk pours.
| Technique | Difficulty Level | Practice Time |
|---|---|---|
| Heart Pattern | Beginner | 1-2 weeks |
| Rosetta Design | Intermediate | 3-4 weeks |
| Tulip Pattern | Advanced | 4-6 weeks |
Practice is key to improving latte art skills. Every try gets you closer to making beautiful coffee art that pleases the eyes and taste buds.
Advanced Layering Techniques for Professional Results
Professional baristas take latte art to new heights with complex designs. They turn simple coffee into stunning works of art. This requires skill, creativity, and a deep understanding of milk and pouring.

3D latte art is all about adding depth and dimension. Artists use special techniques to make designs pop off the coffee surface. These designs grab your attention before you even take a sip.
- Etching allows intricate detailing with fine tools
- Color contrast techniques enhance visual complexity
- Layered pour methods create depth and dimension
Etching is a fancy way to add details to latte art. Baristas use thin tools to carve out patterns after pouring. This turns simple designs into detailed stories.
“Advanced latte art is about storytelling through coffee” – Professional Barista Insight
| Technique | Difficulty Level | Visual Impact |
|---|---|---|
| Multiple Pour Designs | Advanced | High |
| Etching Details | Expert | Intricate |
| 3D Layering | Professional | Dimensional |
Color contrast adds a wow factor to latte art. Artists pick the right milk temperatures and pouring angles. This creates amazing gradient effects that make drinking latte even more enjoyable.
Temperature and Timing Considerations
Making the perfect latte is an art that needs precise temperature and timing. Professional baristas say that getting these right can turn a simple coffee drink into a special experience.
Every detail is important when making latte art. From the start of espresso extraction to the end of layering, it’s all about heat and technique. Knowing how these work together is key to making a top-notch latte.
Optimal Milk Temperature Range
A milk thermometer is a must-have for latte artists. The best milk temperature is between 140°F and 160°F. This range makes the perfect microfoam for layering. Temperatures outside this range can ruin the milk’s texture and the drink’s quality.
- Ideal temperature range: 140°F – 160°F
- Best for creating smooth microfoam
- Critical for maintaining milk protein structure
Espresso Cooling Time
Espresso extraction timing is crucial for making lattes. Letting the espresso cool for 30-45 seconds after brewing is key. It ensures the best flavor and the right texture for layering.
Layer Setting Duration
The layering window is a key moment in latte art. Baristas have 15-20 seconds to finish their design before the milk and espresso separate. Using precise pouring techniques is important to make the most of this short time.
| Stage | Temperature | Time Window |
|---|---|---|
| Espresso Cooling | Around 160°F | 30-45 seconds |
| Milk Pouring | 140°F – 160°F | 15-20 seconds |
“Precision is the soul of latte art. Master your timing, and the canvas becomes yours.” – Professional Barista Wisdom
Troubleshooting Latte Art Problems
Making perfect latte art takes practice and knowing common problems. Issues like bubble formation and pattern distortion can be tough. Learning to fix these will make your latte designs better.
- Bubble formation disrupting smooth milk texture
- Uneven layers compromising design integrity
- Pattern distortion during pouring
- Consistency issues affecting visual appeal
To solve bubble problems, start with the right milk steaming method. Tap and swirl your milk pitcher right after steaming to get rid of big bubbles. Micro-foam consistency is key for clean, sharp designs.
“Perfect latte art is 50% technique, 50% patience” – Professional Barista Wisdom
Uneven layers come from wrong pouring speed and angle. Keep your hand steady and pour at the same height to avoid mess-ups. Begin with simple designs before trying harder ones.
| Problem | Solution |
|---|---|
| Large Bubbles | Tap and swirl milk pitcher |
| Pattern Distortion | Control pour speed and height |
| Inconsistent Texture | Perfect milk steaming technique |
With hard work and these tips, you’ll turn tough latte art moments into chances to get better.
Creative Design Inspiration and Variations
Latte art is more than just patterns. It’s about making coffee a feast for the eyes. Baristas and coffee fans are finding new ways to make lattes stand out.
Seasonal Latte Art Ideas
Seasons bring new ideas for latte art. Each season offers a chance to make your coffee special:
- Spring: Use pastel food coloring for delicate flowers
- Summer: Try tropical patterns with bright colors
- Fall: Create designs with leaves and pumpkins
- Winter: Make snowflakes and holiday art
Color Integration Tips
Adding food coloring can make latte art pop. Here’s how to mix colors well:
- Start with natural food coloring for soft colors
- Begin with a little color
- Use chocolate syrup for brown shades
- Blend colors slowly to keep designs clear
Multiple Layer Designs
Experts in latte art make complex designs. They control milk and pouring to create stunning layers:
| Layer Technique | Difficulty Level | Visual Impact |
|---|---|---|
| Gradient Layers | Intermediate | High |
| Color Blending | Advanced | Very High |
| Geometric Patterns | Expert | Exceptional |
“Creativity in latte art is about pushing boundaries and transforming each cup into a unique canvas.” – Professional Barista
Exploring these ideas lets coffee lovers make each latte a personal work of art. It’s a treat for the eyes and taste buds.
Conclusion
Latte art is a journey, not a finish line. Every pour is a chance to get better and show your creativity. Baristas know it takes patience, hard work, and practice to get it right.
Latte art lets you express yourself in many ways. You can make complex designs or simple hearts. Each cup is a story waiting to be told.
Keep trying new things and learning. Watch videos, go to workshops, and practice a lot. The best latte art mixes skill with passion.
Enjoy the journey of making latte art. Start with the basics, get confident, and then try new things. With effort, you’ll make coffee that looks and tastes amazing.
FAQ
What equipment do I need to start creating latte art?
To start making latte art, you’ll need a few things. First, an espresso machine with a good steam wand is key. You’ll also need a stainless steel milk pitcher, a digital thermometer, and fresh espresso beans. A smooth cup is best for easy pouring and design.
How important is milk texture in creating latte art?
Milk texture is very important in latte art. You need to make microfoam, which is smooth like paint. This lets you pour designs smoothly. Steaming the milk right is crucial for making these designs.
Can I learn latte art at home without professional training?
Yes, you can learn latte art at home. Just watch tutorials online, practice basic designs, and get good equipment. The most important thing is to keep practicing.
What are the most common mistakes beginners make in latte art?
Beginners often make a few mistakes. They might oversteam the milk or pour too fast. They also might not keep the right height or make a good espresso crema. It’s hard to control the pour speed and keep the milk smooth.
How do I prevent bubbles in my milk when steaming?
To avoid bubbles, start by placing the steam wand just below the milk’s surface. Create a gentle whirlpool. Keep the wand at an angle and don’t add too much air at first. After steaming, tap and swirl the pitcher to get rid of big bubbles.
What type of milk works best for latte art?
Whole milk is best for beginners because of its protein and fat. It makes smooth microfoam. But, you can also use oat or almond milk with the right techniques.
How long does it take to become proficient in latte art?
It takes different times for everyone to get good at latte art. But, most people see basic designs after 2-3 months of practice. Getting really good takes 6-12 months of hard work and practice.
Do I need an expensive espresso machine to create latte art?
You don’t need the most expensive machine to start. Many mid-range machines work well. Focus on your technique and practice more than the equipment.
What’s the ideal milk temperature for latte art?
The best milk temperature is between 140-160°F (60-71°C). This makes perfect microfoam. Use a thermometer to get this temperature right every time.
Can I add color to my latte art designs?
Yes! Baristas use safe colorings and syrups for colorful designs. Chocolate syrup and natural colors can make your latte art pop.

