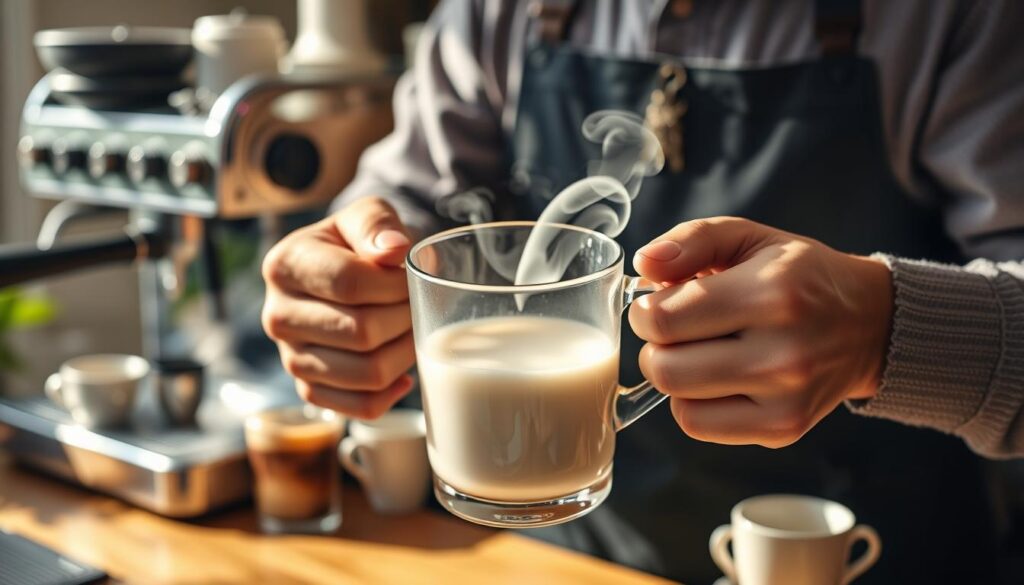
Turning a simple cup of coffee into a work of art is now a favorite hobby for many. Latte art is no longer just for coffee shops. With some practice and the right steps, anyone can make beautiful coffee designs at home.
This guide will take you on a journey into the world of latte art. It breaks down hard techniques into easy steps. Whether you love coffee or want to wow your friends, learning to make latte art can make your morning coffee time more fun.
You’ll learn about steaming milk and pouring techniques. These skills will help you make coffee that looks as good as it tastes. Your coffee will soon be the envy of all your friends.
Key Takeaways
- Latte art is accessible to home coffee makers
- Basic equipment and techniques can be learned quickly
- Practice is essential for improving coffee design skills
- You can create professional-looking designs at home
- Latte art adds fun and creativity to your coffee routine
Understanding the Basics of Latte Art
Latte art turns a regular coffee into a stunning visual. To master it, you need to know the key parts that make your coffee art amazing.
Essential Equipment for Creating Latte Art
Creating latte art needs the right tools. Experts say certain gear is crucial for making beautiful designs:
- Stainless steel milk pitcher with pointed spout
- High-quality espresso machine
- Precision digital scale
- Thermometer for milk steaming
- Tamper for espresso preparation
The Role of Coffee and Milk Quality
Quality espresso is the base of great latte art. Fresh, well-roasted beans with rich crema are essential for your designs.
“Great latte art begins with exceptional ingredients” – Professional Barista
Milk steaming needs careful attention. Whole milk is best because of its protein, which makes smooth microfoam for detailed designs.
| Milk Type | Foam Quality | Design Potential |
|---|---|---|
| Whole Milk | Excellent | High |
| 2% Milk | Good | Medium |
| Skim Milk | Poor | Low |
Temperature and Texture Requirements
Steaming milk right means keeping it between 140-160 degrees Fahrenheit. This temperature makes the milk silky, perfect for latte art.
Knowing these basics is key to making beautiful coffee designs. They will impress everyone, both visually and in taste.
Mastering the Perfect Milk Steaming Technique
Milk frothing turns an ordinary espresso into a creamy latte. It’s an art that baristas perfect with steam wand techniques. Achieving the right microfoam takes precision and practice.

To get exceptional microfoam, understand your steam wand. Start by placing the wand just below the milk’s surface. This creates a whirlpool that introduces air and makes the texture smooth.
- Keep the steam wand at a 45-degree angle
- Maintain consistent depth for uniform heating
- Listen for a subtle chirping sound indicating proper technique
Steam wand techniques also require attention to milk temperature. Aim for 140-160°F (60-70°C). This temperature makes the microfoam velvety without scorching the milk.
“Perfect milk steaming is about feeling the milk’s transformation, not just following strict rules.” – Professional Barista Training Manual
| Milk Frothing Stage | Temperature Range | Desired Texture |
|---|---|---|
| Initial Aeration | 100-120°F | Introducing air bubbles |
| Heating Phase | 120-140°F | Developing microfoam |
| Final Stage | 140-160°F | Smooth, glossy texture |
Practice is key to mastering milk frothing. Try different milks and techniques to find your perfect method.
The Fundamental Pouring Techniques for Latte Art
Latte art pouring needs precision and skill. Baristas know it’s more than mixing espresso and milk. It’s about mastering subtle movements to make a drink into a work of art.
Controlling the milk pitcher is key to great latte art. You need to feel the movement and position of your hand to make detailed designs.
Getting the Right Height and Speed
The height you pour from affects your design. Aim for 1-2 inches from the cup. Pouring at a steady speed keeps the espresso’s surface smooth.
- Start close to the cup’s surface
- Move pitcher slowly and steadily
- Adjust height for different patterns
Understanding Flow Control
The flow of milk is crucial for your design. Building muscle memory helps you pour smoothly. This creates detailed designs in your espresso.
| Flow Type | Design Impact |
|---|---|
| Slow Stream | Detailed intricate patterns |
| Medium Stream | Classic heart and rosetta shapes |
| Fast Stream | Basic geometric designs |
Position and Movement Basics
Your wrist is important in making stunning latte art designs. Use gentle, controlled movements. This lets the milk blend well with the espresso. Tilting and steady pouring are key to mastering latte art.
“Latte art is a dance between milk and espresso – learn the rhythm, and magic happens.” – Professional Barista
Preparing Your Espresso Shot for Latte Art
Creating stunning latte art starts with a perfect espresso shot. The quality of your espresso is key. It affects both the look and taste of your design.

Getting great crema quality takes precision and detail. Professional baristas focus on these steps for amazing latte art:
- Choose high-quality, freshly roasted coffee beans
- Grind beans immediately before brewing
- Use the correct grind size for espresso
- Maintain consistent water temperature (195-205°F)
“A perfect espresso shot is the canvas for your latte art masterpiece.” – Specialty Coffee Association
The espresso extraction process needs careful technique. Aim for a 25-30 second extraction time. This makes a rich, balanced shot with a golden-brown crema. This crema is key for clear latte art patterns.
| Espresso Extraction Factor | Optimal Range |
|---|---|
| Extraction Time | 25-30 seconds |
| Water Temperature | 195-205°F |
| Grind Consistency | Fine, uniform |
Choosing the right espresso machine and keeping it in good shape is crucial. Regular cleaning, proper calibration, and knowing your equipment well are vital for consistently great shots.
Latte Art for Beginners: Easy Designs to Try at Home
Mastering latte art at home is easy. With practice and simple techniques, you can impress your friends. Here are three easy designs for beginners.

Learning latte art needs patience and a steady hand. These designs will boost your confidence and improve your pouring skills.
The Basic Heart Shape
The heart is a classic and easy latte art pattern. To make it:
- Pour steamed milk into the center of your espresso
- Keep the pitcher close to the surface
- Move slowly and steadily
- Finish with a quick pull through the center to form the heart’s point
Simple Rosetta Pattern
Try the rosetta after mastering the heart. This design needs a bit more skill:
- Start with a steady milk flow
- Wiggle the pitcher side to side gently
- Create a fan-like pattern across the surface
- Finish with a clean line through the design
Basic Tulip Design
The tulip is a bit more advanced. It builds on the heart shape:
- Pour milk in small, stacked circles
- Create layers by gently tapping the pitcher
- Pull through the center to complete the design
“Practice makes perfect in latte art. Don’t get discouraged if your first attempts look messy!” – Professional Barista
Creating beautiful latte art takes time. Each pour gets better. So, keep practicing and enjoy the journey!
Common Mistakes to Avoid in Latte Art

Mastering latte art takes time and effort. New baristas often make mistakes that can stop their progress. Knowing these errors is key to getting better and making stunning designs.
Let’s look at the main challenges beginners face:
- Inconsistent Milk Texture: Smooth, glossy microfoam is essential. Bumpy or bubbly milk messes up designs
- Incorrect Pouring Technique: The speed and height of pouring greatly affect the design
- Poor Espresso Quality: A weak or over-extracted shot can ruin the latte art
“The difference between good and great latte art is attention to detail.” – Professional Barista
One big problem for beginners is keeping the right pour speed. Pouring too fast blurs the design, too slow and it won’t form right. The trick is to control the pitcher’s movement and keep your hand steady.
Fixing coffee design mistakes starts with knowing these basic errors. Work on each skill separately, like steaming milk, making espresso, and pouring.
- Watch professional tutorials
- Practice every day with water first
- Record and analyze your tries
Every barista was once where you are now. Keep trying and paying attention, and you’ll turn these common mistakes into chances to improve.
Troubleshooting Your Latte Art Problems
Making stunning latte art takes time and effort. Even pros face problems perfecting their designs. This guide will help you solve common latte art issues and enhance your designs.
Fixing Milk Texture Issues
The right milk texture is key for great latte art. Bad steaming can mess up your design. Here are tips to improve your milk:
- Make sure your milk is cold and fresh
- Use a clean, well-maintained steam wand
- Make a smooth, glossy microfoam
- Stay away from big bubbles that mess up your design
Addressing Pour Control Problems
Getting your pour just right is crucial. Baristas often find it hard to keep a steady flow and speed.
| Problem | Solution |
|---|---|
| Unsteady hand | Practice pouring with water to get better |
| Inconsistent stream | Adjust the pitcher’s height and angle |
| Shaky movement | Keep your elbow and wrist steady |
Pattern Formation Challenges
Creating detailed latte art patterns needs skill and technique. You might face issues that stop you from getting pro-looking designs:
- Start with simple designs like hearts and rosettas
- Keep your pouring speed consistent
- Use the right amount of milk and espresso
- Try different pitcher spout designs
“Perfecting latte art is about patience, practice, and understanding the subtle techniques that transform an ordinary coffee into a visual masterpiece.”
Latte art troubleshooting is a journey. With hard work and focus, you’ll get better at making complex and beautiful designs.
Advanced Tips for Improving Your Latte Art Skills
To get better at latte art, you need to work hard and practice smart. Professional baristas know that making great coffee designs is more than just pouring. It’s about learning and improving your skills all the time.
Experienced coffee artists share some important tips to boost your latte art skills:
- Practice precise microfoam consistency by controlling steam wand angle
- Develop muscle memory through repetitive pouring exercises
- Experiment with different espresso extraction techniques
- Invest in high-quality professional equipment
“Great latte art is 50% technique and 50% passion” – Professional Barista Training Manual
Learning to make intricate milk textures is key. Start by practicing with water to get better at pouring. This way, you can improve your hand movements for detailed latte art designs.
Improving at latte art takes time and effort. Try recording yourself while you pour to see how you can get better. Go to workshops, watch tutorials, and try making more complex designs.
Practice Exercises and Drills for Better Results
Getting good at latte art takes a lot of work and practice. Baristas and coffee lovers can get better by doing specific exercises. These exercises help build muscle memory and improve your skills.
To get better at latte art, you need a plan. Here are some exercises to help you improve and see your progress.
Daily Training Drills
- Practice milk steaming for consistent micro-foam texture
- Perform pouring techniques using water first to understand flow control
- Sketch design patterns on paper to visualize movement
- Record video of your pours for self-evaluation
Progress Tracking Methods
| Tracking Method | Purpose | Frequency |
|---|---|---|
| Design Portfolio | Document visual improvement | Weekly |
| Technical Skill Assessment | Evaluate pour consistency | Bi-weekly |
| Performance Journal | Log challenges and breakthroughs | Daily |
“Excellence in latte art comes from deliberate practice and passionate commitment to the craft.” – Professional Barista
By adding these latte art techniques to your daily routine, you’ll get better. You’ll improve your design skills and make your coffee art look amazing.
Conclusion
Starting your latte art journey is an exciting adventure. It turns simple coffee into a canvas of creativity. Your skills will grow with practice, patience, and passion. Each pour is a chance to improve and show your artistic side through espresso and steamed milk.
Becoming a skilled home barista takes dedication. Begin with basic designs like hearts and rosettas. This will help you build confidence and precision. Remember, every pro started where you are now, learning and experimenting.
Professional baristas say to enjoy the learning journey. Get good equipment, practice often, and don’t get down on early mistakes. Your skills will grow with each cup, making coffee a personal art form. Celebrate small wins and keep trying new designs.
Keep learning by watching online tutorials, attending workshops, and meeting coffee lovers. Your latte art journey is special. It’s filled with creativity, learning, and the joy of making beautiful drinks at home.
FAQ
What equipment do I need to start creating latte art at home?
To start making latte art at home, you’ll need a few things. First, get an espresso machine and a milk steaming pitcher. Also, a thermometer and a good coffee grinder are important. A digital scale can help you make your espresso shots the same every time.
How important is milk quality in creating latte art?
Milk quality is very important for latte art. Use fresh, cold whole milk for the best results. It makes the microfoam creamy and stable, which is key for smooth patterns.
How long does it take to learn basic latte art designs?
Learning basic designs like hearts or simple rosettas takes about 2-4 weeks with practice. It’s all about improving your steaming and pouring skills.
What are the most common mistakes beginners make in latte art?
Beginners often make a few common mistakes. They might steam the milk wrong, pour from the wrong height, or move the pitcher too fast. Keeping your hand steady is also a challenge.
Can I practice latte art without an expensive espresso machine?
Yes, you can practice latte art without a fancy espresso machine. Start with methods like Moka pot or AeroPress. Some even practice with water to get better at pouring.
How do I know if my milk is steamed correctly?
Good steamed milk looks glossy and smooth, like paint. It should have no big bubbles. When you tilt the pitcher, it should look silky and even.
What type of coffee works best for latte art?
For latte art, use freshly roasted espresso beans with a rich crema. Medium to dark roast espresso is best for creating detailed designs.
How can I improve my pouring technique?
Improve your pouring by practicing steady, controlled movements. Pour from about 1-2 inches above the cup. Start slow and keep your hand steady. Watching tutorials and practicing often will help.
Are there any online resources to help me learn latte art?
Yes! You can find lots of free tutorials on YouTube, Instagram, and coffee websites. Barista training channels and coffee blogs have great guides for beginners.
How do temperature and texture impact latte art?
Temperature and texture are key. Steam the milk to 140-150°F, and make sure the microfoam is smooth. Wrong temperature or texture can mess up your designs and taste.

